Workflow Designer Interface
Many of the operations described in this topic can be performed using keyboard shortcuts.
Overview
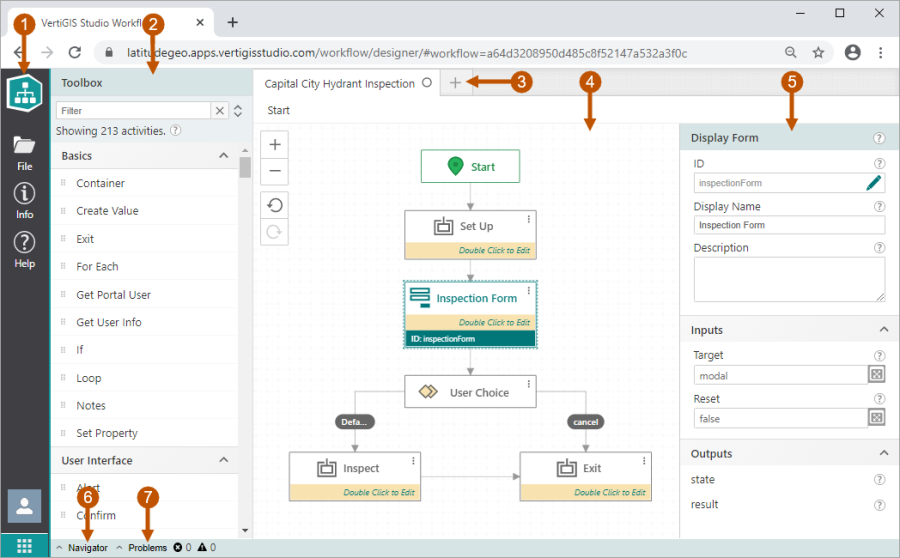
The main parts of Workflow Designer's user interface are as follows:
|
|
Sidebar: The sidebar has the following options:
|
|
|
Toolbox: The Toolbox contains activities that you can use to build workflows. An activity is only visible in the Toolbox if it is compatible with the application(s) you chose when you created the workflow. See Create Workflows for more information. To add an activity to a workflow, drag the activity from the Toolbox to the design surface and connect it to the flowchart. Use the Toolbox's Filter function to find a particular activity. See Search the Toolbox for an Activity for information. |
|
|
Tabs: Every workflow in Designer is on its own tab. Click the A workflow's tab shows the workflow's title. Beside the title is an icon—either Below the workflow's title are breadcrumbs that show your current depth within the workflow. Use the breadcrumbs to navigate up one or morel levels.
Breadcrumbs to navigate the workflow's levels |
|
|
Design Surface: The design surface is where you design workflows. To design a workflow, drag activities from the Toolbox to the design surface, connect them into a flowchart, and configure their properties. The design surface has tools to zoom in |
|
|
Properties Panel: The Properties panel shows the properties for the currently selected activity. Click an activity on the design surface to select it and view its properties. All activities have ID, Display Name, and Description properties. Most activities also have inputs (properties whose values you configure for the workflow to operate on) and outputs (properties that are given a value by the activity when it runs). The inputs and outputs for a particular activity are described on the activity's page in the Activity Reference. |
|
|
Navigator: The Navigator provides a quick way to navigate workflows. Click an activity in the Navigator to jump to the activity in the flowchart. For more information, see Navigator. |
|
|
Problems: Click Problems to open the Validation panel. The Validation panel lists the errors, warnings, and information messages for all open workflows. Click a message to navigate the flowchart to the source of the problem. For more information, see Validation Panel. |


File Menu
To open the File menu, click File in the sidebar. The File menu has the following options: New, Open, Delete, Open by URL, Save, Save As, Import, and Export.
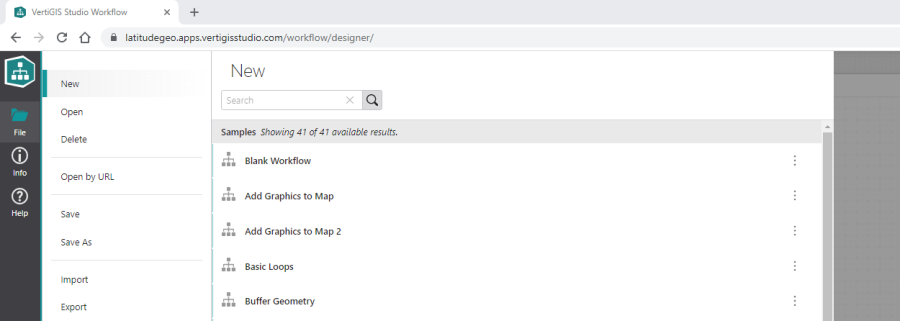
File | New
The New option creates a new workflow that is a copy of a sample. The Blank Workflow sample creates a blank workflow. The remaining samples perform common tasks, like geocoding, using forms, or sending web requests.
If you are not sure if a sample exists, browse or search the list of samples. The Search function searches the titles, summaries, and descriptions of workflow items in ArcGIS. To search for a sample, type some text that you think might appear in the title, summary, or description in the Search box, and then click Search or press Enter.
For more information, see Methods to Create a Workflow.
File | Open
The Open option opens an existing workflow. To open an existing workflow, click File | Open, select the workflow, and then click Open or press Enter. Alternatively, double-click the workflow. The workflow opens on a new tab in Designer.
You can open a workflow's item in ArcGIS from the Open panel: Click the workflow's action menu ![]() and select the option to open it in ArcGIS.
and select the option to open it in ArcGIS.
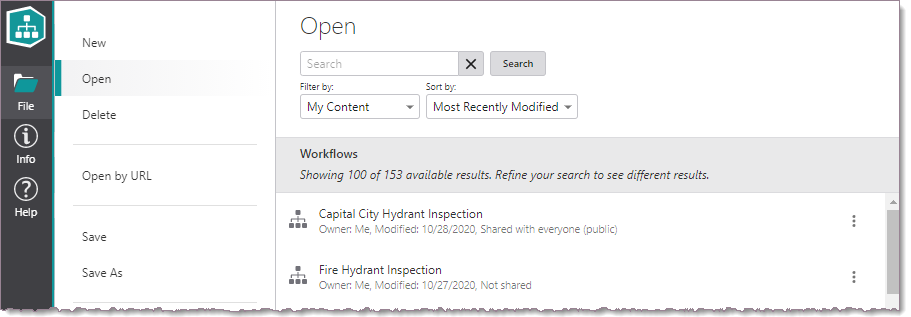
The Open panel has Search, Filter, and Sort functions to help you find a workflow:
-
Search: To search for a workflow, type some text into the Search box and click Search or press Enter. The Search function searches the titles, summaries, and descriptions of workflow items in ArcGIS.
The workflow's title in Designer is the same as the item's title. Similarly, the workflow's description on the Info panel in Designer is the same as the item's description.
-
Filter: There are several options to filter the list of workflows: My Content, Favorites, and Shared With Me. These correspond to the My Content (
 ), My Favorites (
 ), and My Groups/My Organization (
 ) areas in ArcGIS respectively.
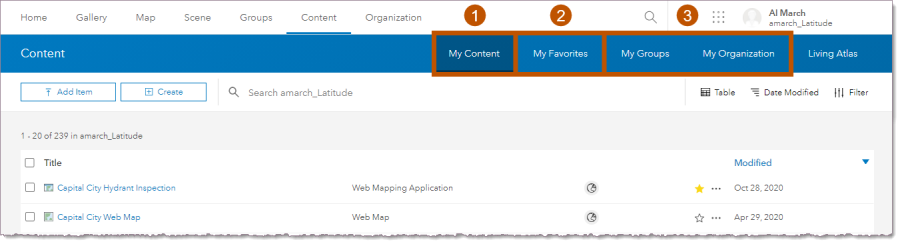
The Open panel's filter options correspond to locations in ArcGIS
-
My Content: The My Content option lists workflows whose items are in your My Content area in ArcGIS. This option is the default.
-
Favorites: The Favorites option lists workflows whose items are in your My Favorites area in ArcGIS. To add a workflow to your list of favorites, open the workflow's item in ArcGIS and click
 Add to Favorites.
 -
Shared With Me: The Shared With Me option lists workflows whose items are in your My Groups or My Organization area in ArcGIS. These workflows have been shared with you by another Workflow author in your organization.
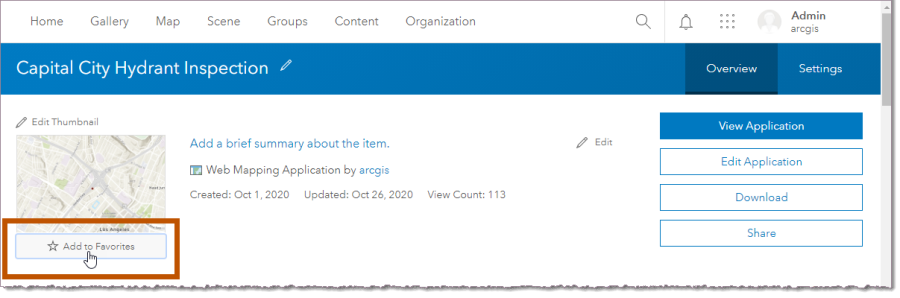
Add a workflow to your favorites in ArcGIS
-
-
Sort: There are several options to sort the list of workflows—Most Recently Modified, Least Recently Modified, Title, and Owner. You can sort by Title or Owner alphabetically (A-Z) or reverse alphabetically (Z-A). By default, the Open panel sorts the list of workflows by Most Recently Modified.
File | Delete
The Delete option deletes the selected workflow and its ArcGIS item. To delete a workflow, click File | Delete, find the workflow, select it, and then click Delete or press Enter. Alternatively, double-click the workflow. You will be prompted to confirm.

The Delete panel has Search and Sort functions to help you find a workflow:
-
Search: To search for a workflow, type some text into the Search box and click Search or press Enter. The Search function searches the titles, summaries, and descriptions of workflow items in ArcGIS.
-
Sort: There are several options to sort the list of workflows—Most Recently Modified, Least Recently Modified, Title, and Owner. You can sort by Title or Owner alphabetically (A-Z) or reverse alphabetically (Z-A). By default, the Delete panel sorts the list of workflows by Most Recently Modified.
File | Open by URL
The Open by URL option opens the workflow with the specified URL. To open a workflow by URL, you must have permission to access the workflow.
The Open by URL option provides an easy way to share workflows between Workflow authors in the same organization. See Share Workflows by URL for information.
File | Save
The Save option saves the current workflow under its existing title. If the workflow has not been saved before, clicking File | Save performs a Save As operation.
File | Save As
The Save As option saves the current workflow under the title you enter and creates an item for the workflow in ArcGIS with the same title. The URL of the new item is used as the workflow's URL. The URL appears on the Info panel in Workflow Designer.
File | Import
The Import option imports a previously exported workflow into Workflow Designer. For more information, see Import and Export Workflows.
File | Export
The Export option exports the current workflow in JSON format. This enables you to move workflows between portals. It also enables you to share with Workflow authors outside your organization. For more information, see Import and Export Workflows.