Show Results in Web AppBuilder
The Show Results activity works in 2D Web AppBuilder apps only. The Show Results activity does not work in 3D apps.
In Web AppBuilder, feature data is displayed in attributes tables. Each layer has its own table on a separate tab.
The Show Results activity uses the layer's attributes table to display the feature data. If the features have geometries, the geometries are highlighted on the map.
If there are already features selected in the layer when the Show Results activity runs, the feature set is combined with the features that are already selected. For example, you could add two Show Results activities to your workflow. The first Show Results activity displays and selects its feature set. The second Show Results activity combines its feature set with the existing features and selects the features in the combined set.
Configure the Show Results Activity to Run in Web AppBuilder
To configure a Show Results activity in a workflow that will run in Web AppBuilder, you must configure the Features and Layer Name inputs. Configuring the Combine Mode input is optional. Note that these are the only inputs that Web AppBuilder supports.
Inputs Supported by Web AppBuilder
-
Features: (required) The features to display. You can specify a feature set, a collection of features, or a single feature. If you specify a collection of features or a single feature, the Show Results activity converts it to a feature set.
-
Layer Name: (required) The name of the layer that the features belong to. If the layer exists in the map, then Web AppBuilder displays the geometries on the layer and uses the layer's attributes table to select the features. If the layer does not exist in the map, then Web AppBuilder creates a graphics layer to display the geometries and creates a new tab for the feature data.
-
Combine Mode: Specifies how to combine the features with the features in the attributes table that are already selected. By default, if an attributes table for that layer is already open, the features are unioned with the existing features. If you want to use a different method of combining the features, configure Combine Mode.
Example - Display Query Results
This example shows you how to use a Show Results activity to display the features returned by a Query Layer activity in a Web AppBuilder app. The query returns features for US states in the Mountain region. The geometries are also returned.
This example assumes that you already have a 2D Web AppBuilder app that you can use to run the workflow. The map should include this layer https://sampleserver6.arcgisonline.com/arcgis/rest/services/Census/MapServer/3.
Workflow Logic
The workflow has the following activities, in the order shown:
-
Query Layer (
query1): Query an ArcGIS layer for US states in the Mountain region. -
Show Results: Display the features returned by the query.
To use the Show Results activity to show query results in a Web AppBuilder app:
-
Open Workflow Designer.
-
In a new, blank workflow, add the following activities and connect them in the given order:
- Query Layer (
query1) - Show Results
- Query Layer (
-
Query Layer: Configure the inputs:
-
Url:
https://sampleserver6.arcgisonline.com/arcgis/rest/services/Census/MapServer/3This is the URL for a layer of US states.
-
Where:
SUB_REGION='Mountain' -
Return Geometry:
true -
Output Spatial Reference: Enter the spatial reference of the map. This ensures that the geometries are rendered accurately on the map.
-
Output Fields:
STATE_NAME, SQMI, POP2007, OBJECTIDThe query must get the field that is specified as the ArcGIS layer's objectIdField. In the layer used in this example, the field is called OBJECTID.
-
-
Show Results: Configure the inputs:
-
Set the Features input to:
=$query1.resultsThis specifies the features to display.
-
Set the Layer Name input to:
statesThis specifies the name of the ArcGIS layer that the features belong to.
-
-
Press Ctrl+S to save the workflow.
-
Configure your Web AppBuilder app to run the workflow.
See Host and Run Workflows in ArcGIS Web AppBuilder for information.
-
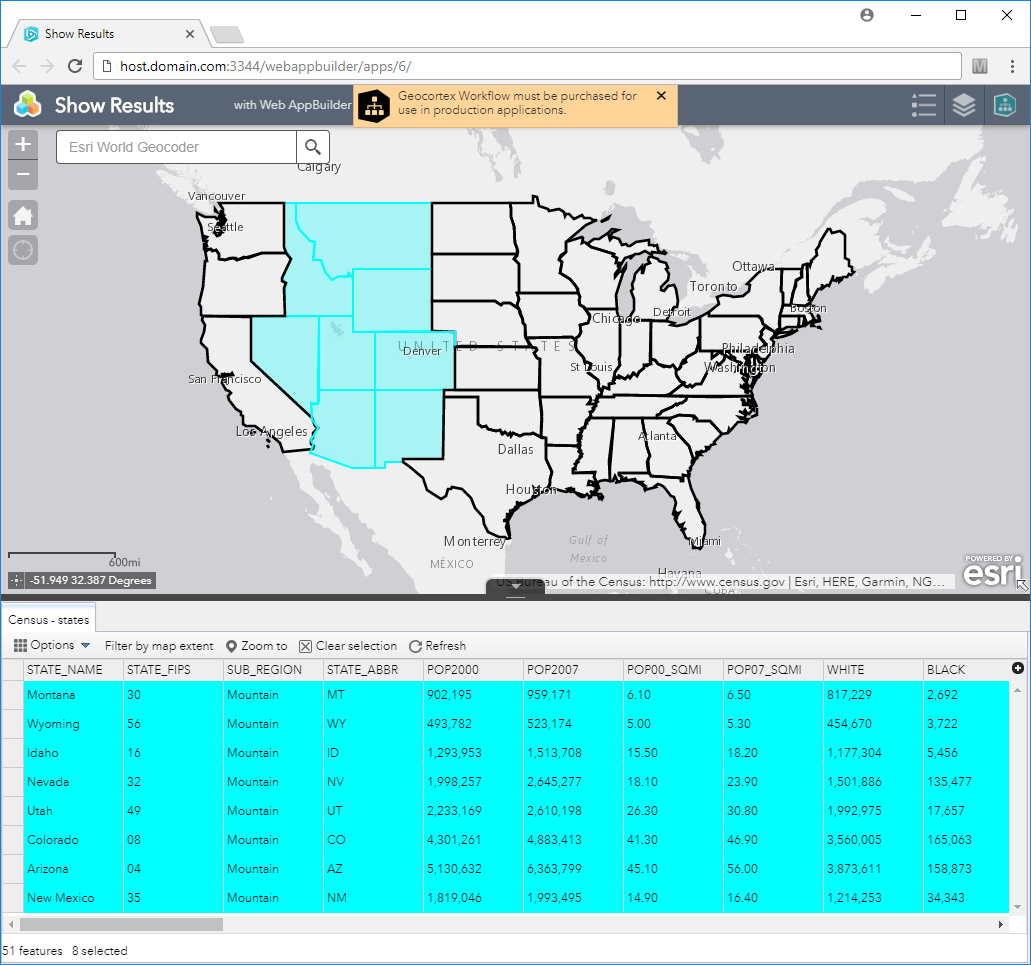
Launch or refresh the app and run the workflow.
The features are listed in the attributes table and highlighted on the map.