Manage an On-Premises Installation
This topic discusses changes that you can make to an existing on-premises installation. If you have not yet installed VertiGIS Studio Workflow and configured the post-installation settings, follow the instructions in Install VertiGIS Studio Workflow on Premises
Managing an on-premises installation may require periodically updating the software or changing the post-installation configuration:
See also...
Move Workflows from One Portal to Another
Update On-Premises Workflow
VertiGIS periodically releases updates to on-premises Workflow that include new features and other improvements to the software. To update Workflow, run the new installer.
To update an on-premises installation of VertiGIS Studio Workflow:
-
Download the installer.
-
Run the installer.
The installer detects your existing installation and prompts you to update.
-
Click Update.
-
When the update completes, click Finish.
The Post-Installation Configuration launches.
-
Click through the Post Installer to upgrade any dependencies.
You should click through the Post Installer even if there are no changes to be made.
Manage the Post-Installation Configuration
Managing an on-premises Workflow installation may require changing the post-installation configuration:
Open the Post Installer
To open the VertiGIS Studio Workflow Post Installer:
-
In the Windows Start menu, start to type VertiGIS Studio Workflow.
The Start menu will show the Post Installer application.
-
Click VertiGIS Studio Workflow Post Installer.

Activate Additional Licenses
To activate additional licenses that you have purchased:
-
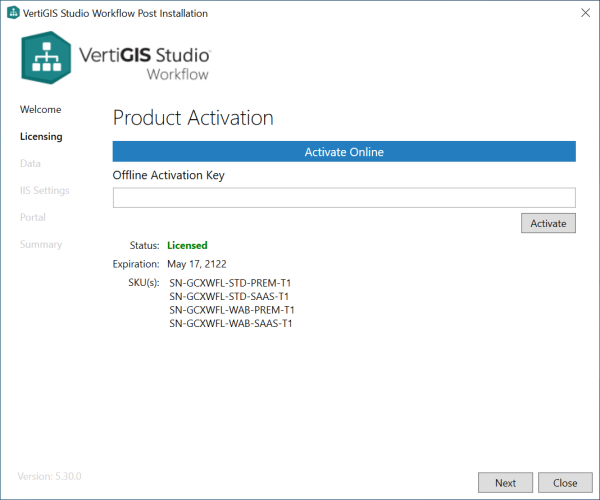
Open the Post Installer and click Licensing in the sidebar.
-
Follow the steps for one of the following options:
-
Activate Online: To activate VertiGIS Studio Workflow online, you must have a VertiGIS Studio account.
-
Click Activate Online.
-
Sign in to your VertiGIS Studio account.
Activation will complete automatically.
or
-
-
Activate Offline: To activate VertiGIS Studio Workflow offline,
-
Contact Customer Service at
customerservice-ca@vertigis.comto request an activation key.While you wait for your key, you can use the trial license, as long as it has not expired.
-
When you receive the key:
-
Click Licensing to open the Licensing panel.
-
Paste the key into the Offline Activation Key box.
-
Click Activate.
-
Click Close to close the Post Installer.
-
-
-
Click OK to close the License Status dialog box.
-
Close the Post Installer when you are finished.
Move the Data Directory
We recommend that you choose a permanent location for the data directory one time only, immediately after you install VertiGIS Studio Workflow.
The following procedure ensures you do not lose access to your existing workflows if you change the data directory's location. Some possible locations for the data directory are given here.
To move the data directory after you have used VertiGIS Studio Workflow:
-
Stop the application pool to take Workflow Server offline.
This prevents data changes while you move the data directory.
-
Copy the data directory to the new location.
-
Give the application pool identity write permission in IIS.
The default identity is
IIS AppPool\VertiGISStudioWorkflow. -
In the Post Installer, change the data directory to the new location.
-
Close the Post Installer.
-
Restart the application pool.
-
Delete the old data directory.
Change the IIS Deployment
You can change the location where VertiGIS Studio Workflow is deployed.
-
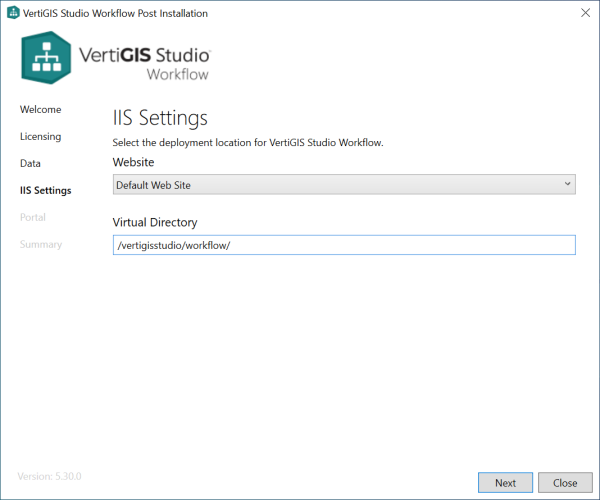
Open the Post Installer and click IIS Settings in the sidebar.
-
To use a different website, select the website from the Website drop-down list.
-
To use a different virtual directory, type the path in the Virtual Directory box.
-
Click Portal in the sidebar.
-
Update the Redirect URL to reflect the new IIS deployment.
You may have to update the redirect URI of the Application item in Portal for ArcGIS as well.

-
Click Close to close the Post Installer when you are finished.
Change the ArcGIS Registration
You can change how VertiGIS Studio Workflow is registered with ArcGIS.
-
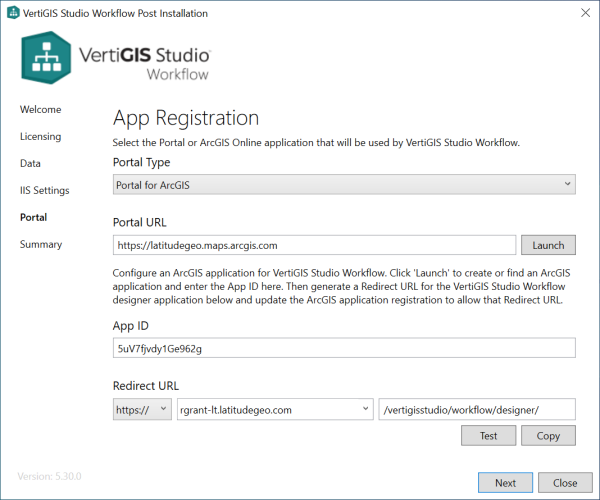
Open the Post Installer and click Portal in the sidebar.
-
If you are changing to a different portal type, select the type of portal you use from the Portal Type drop-down list—ArcGIS Online or Portal for ArcGIS.
-
If you changed the Portal Type, follow the instructions for the Portal Type you selected:
-
ArcGIS Online: In the Organization box, enter your ArcGIS organization name, for example
myorganization, or the URL of your ArcGIS Online portal, for example,https://myorganization.maps.arcgis.com. -
Portal for ArcGIS: In the Portal URL box, enter the URL for your portal, for example,
https://portal.domain1.com/arcgis/.
-
-
In the Redirect URL area:
-
Make sure https:// is selected.
-
Select the host name of your Workflow server from the drop-down list.
Alternatively, type or paste the host name.
-
Click Copy to copy the redirect URL to your clipboard for use in a later step.
The virtual path is entered automatically based on the IIS Settings.
-
-
Follow the instructions that apply to you:
-
If your organization already uses other VertiGIS Studio products that are registered with the same portal as VertiGIS Studio Workflow, we recommend that you use the existing ArcGIS item to register Workflow with the portal. Follow the instructions in Register VertiGIS Studio Workflow Using an Existing ArcGIS Item.
-
If this is the first VertiGIS Studio product registered with this portal, you will have to create an ArcGIS Application item and use it to register VertiGIS Studio Workflow. Follow the instructions in Register VertiGIS Studio Workflow Using a New ArcGIS Item.
Register VertiGIS Studio Workflow Using an Existing ArcGIS Item
-
Click Launch to open the portal in your browser.
-
View the item's details.
-
On the Settings tab, scroll down to the App Registration area and click Update.
-
Paste the copied redirect URL into the Redirect URI box, and then click Add.
The URL is added to the list of permitted redirect URLs.
-
Click Update.
-
Copy the App ID from the App Registration area to the clipboard.
-
On the Overview tab, edit Tags and add one or more tags for VertiGIS Studio Workflow.
-
Return to the Post Installer to enter the app ID.
Register VertiGIS Studio Workflow Using a New ArcGIS Item
There are two steps:
-
Sign in to your portal and open the Content page.
-
In My Content, click Add Item and select An application.
-
Configure the application using the following settings, and then click Add Item.
-
Type:
Web Mapping -
Purpose:
Ready to Use -
API:
JavaScript -
URL: Paste the redirect URL that you copied in the previous step.
For example:
https://apps.domain2.com/vertigisstudio/Workflow/designer -
Title: For example:
VertiGIS Studio Workflow -
Tags: For example:
VertiGIS StudioandWorkflowYou may want to add additional tags used by your organization.
A new application is added to the portal.
-
Step 2: Use the item to register VertiGIS Studio Workflow with the portal
-
On the Settings tab, scroll down to the App Registration area.
-
Click Register beside App Registration.
-
Paste the copied redirect URL into the Redirect URI box, and then click Add.
The URL is added to the list of permitted redirect URLs.
-
Click Register to complete the application registration.
-
Copy the app ID to the clipboard.
-
-
Enter the App ID: In the Post Installer, paste the app ID into the App ID box.
-
Click Test to test the application registration.
The Post Installer will either show a success message or prompt you to fix any errors.
If Portal for ArcGIS is secured using Windows Integrated Security and anonymous access to the portal is disabled in IIS, the Post Installer will present a warning that says: "The portal application registration is valid—however the specified portal requires authentication". You must install the VertiGIS Studio Web Adaptor Extensions to allow VertiGIS Studio Workflow to communicate with Portal for ArcGIS.
-
Close the Post Installer when you are finished.
Manage the Service Account
The first time you run the Post Installer, it creates a local user account called IIS AppPool\VertiGISStudioWorkflow that VertiGIS Studio Workflow uses in its back-end operations. This account is required for running workflows.
You can modify the account in IIS, in case you need to:
-
Update the password if it expires.
-
Access Windows-secured ArcGIS Server running on a different machine.
A domain user is required for this action.
-
Configure a data directory located on the network.
A domain user is required for this action.
The account can be a local user or a domain user, but not a machine account.