Configure Parameters
You can configure a print template to take inputs at run time. This is useful if you want to allow the end user to supply a custom title, notes, or other text to include in the print output.
To configure a print template to take a text input, you add a String parameter to the template and then use the parameter in a Label control. The user will be presented with a text box to enter a value for the input.
You can configure default values for parameters. The preconfigured templates have two parameters: Title and Notes. The Title parameter has a default value, while the Notes parameter does not.
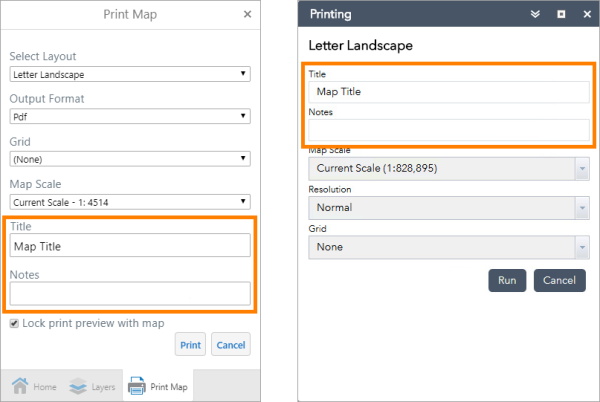
Example of input parameters in a Geocortex HTML5 viewer (left) and in a Web AppBuilder app (right)
Main Steps to Configure a Print Template to Take Inputs
- Add a parameter to the print template.
- Use the parameter in a Label control.
- Repeat these steps for each input.
Configure a Print Template to Take Text Inputs from the User
To configure a print template to take text inputs from the end user:
Step 1: Add a parameter to the print template
-
Launch Print Designer and open or create a print template.
-
In the Field List
 , click
  Parameters to show the Add button.
 -
Click Add parameter
 .
. A new parameter is added.
-
Click Edit
 to edit the parameter.
 -
Configure the parameter's properties:
-
Name: Type a name for the parameter, for example,
TitleorNotes.Use the name to reference the parameter:
[Parameters.Name]The name can include letters, numbers, and underscore characters (_). The name cannot contain spaces or special characters.
The Preview function uses the name to label the input text box.
-
Description: Type a description for the parameter.
The description is used to label the input text box in host applications.
The description can include letters, numbers, spaces, and special characters.
-
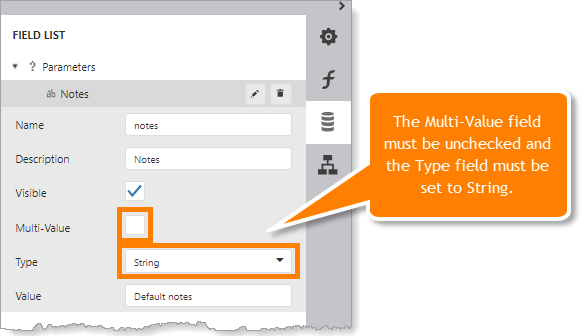
Visible: Make sure the Visible checkbox is selected.
-
Multi-Value: Make sure the Multi-Value checkbox is cleared.
Only single-value parameters of type String are presented to the end user as inputs.
-
Type: Make sure Type is set to String.
Only single-value parameters of type String are presented to the end user as inputs.
-
Value: Optionally specify a default value for the parameter.
The default value is used if the user does not enter a value. It is also used when you preview the print in Print Designer, if you don't enter a value.
The configuration will look something like this:
Example configuration for a parameter called notes
-
Step 2: Use the parameter in a Label control
-
Drag the parameter from the Field List to the desired band.
This adds a Label control that is configured with the expression
[Parameters.parameterName], whereparameterNameis the name of the parameter that you added.Alternatively, you can add a Label control to the design surface and set its Expression setting to
[Parameters.parameterName]in the Properties panel.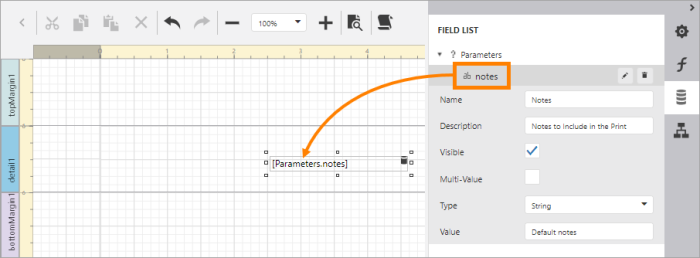
Use a parameter called Notes in a print template by dragging it from the Field List to a band
-
Adjust the size and position of the control and format it.
-
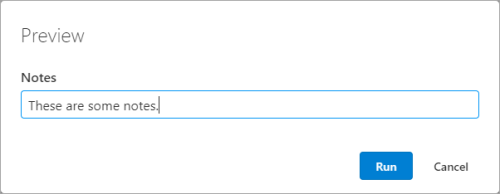
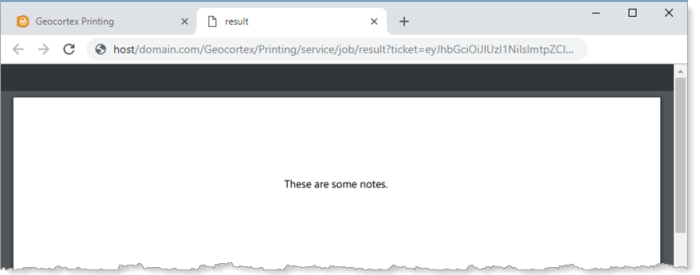
Verify the parameter:
-
Click Preview
 .
.The preview will prompt you for a value.
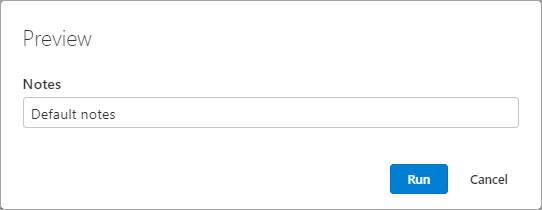
Prompt to enter a value for the notes input
-
Type a value in the Notes box.
Alternatively, you can skip this step to accept the default value.
-
Click Run to generate the print.
The PDF will open in a new browser tab.
-
-
Repeat steps 1 and 2 for each input that you want to include in the print template.