Deploy an App
The deployment process in Mobile Designer makes it possible to move an app through several stages after the app is configured. These stages include Development, Testing, Staging, and Production. You can also change the deployment strategy to include the optional stages: Test and Staging.
Movement of the app through these stages is only in one direction. For example, if you are in the Production stage and need to edit a component, you can only edit the component in the Development stage. That means that you need to return to the Development stage, make the changes and then move the app through the other deployment stages again.
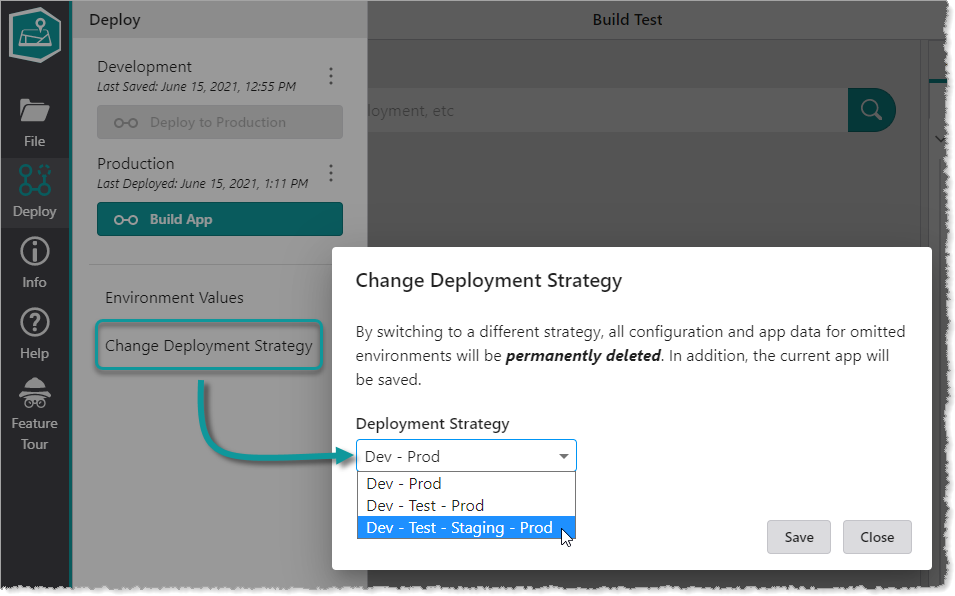
To change your deployment strategy:
- In Mobile Designer, click Deploy | Change Deployment Strategy.
-
In the Deployment Strategy drop-down list, select the strategy you want to use.
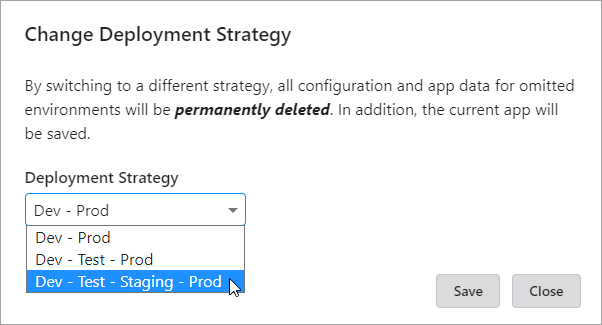
- Click Save.
Integration with Esri Through Deployment Stages
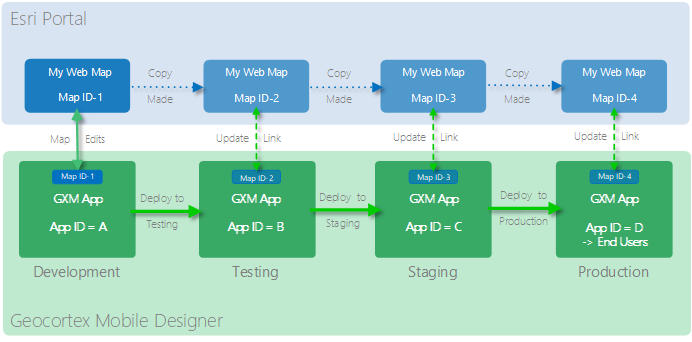
As you move your Mobile app through different deployment stages within the Mobile Designer, a copy of its web map is created and given a new ID in the Esri portal. The stage that the map is in is added to the name of the web map, for example, My Mobile Map (test). At the same time, a copy of the Web Application you are creating is also saved in the portal and labelled with the stage it is at, for example, My Mobile App (test).
Once an app reaches the Production stage, it's given a unique and permanent ID that stays with the app from that point onwards. This is the ID that is shared with end users. The web map and the app have (prod) added to the name in the portal.
Where to Find Saved Apps
Because apps are saved in your portal and a new version of the same app is saved at each deployment stage, it's important to know where to find the apps you want to share, or work on. For example, you may want to give your QA testers access to the app in the Testing stage in your portal, or give your field workers access to the app in the Production stage.
You can find a list of apps that you have created or others have shared with you in the following:
-
VertiGIS Studio Go: The selection screen opens when you first open VertiGIS Studio Go and displays a list of apps that you have created or have permissions to view.
When you have deployed an app to other deployment stages, each version is listed under the deployment stage: Development, Test, Staging or Production.
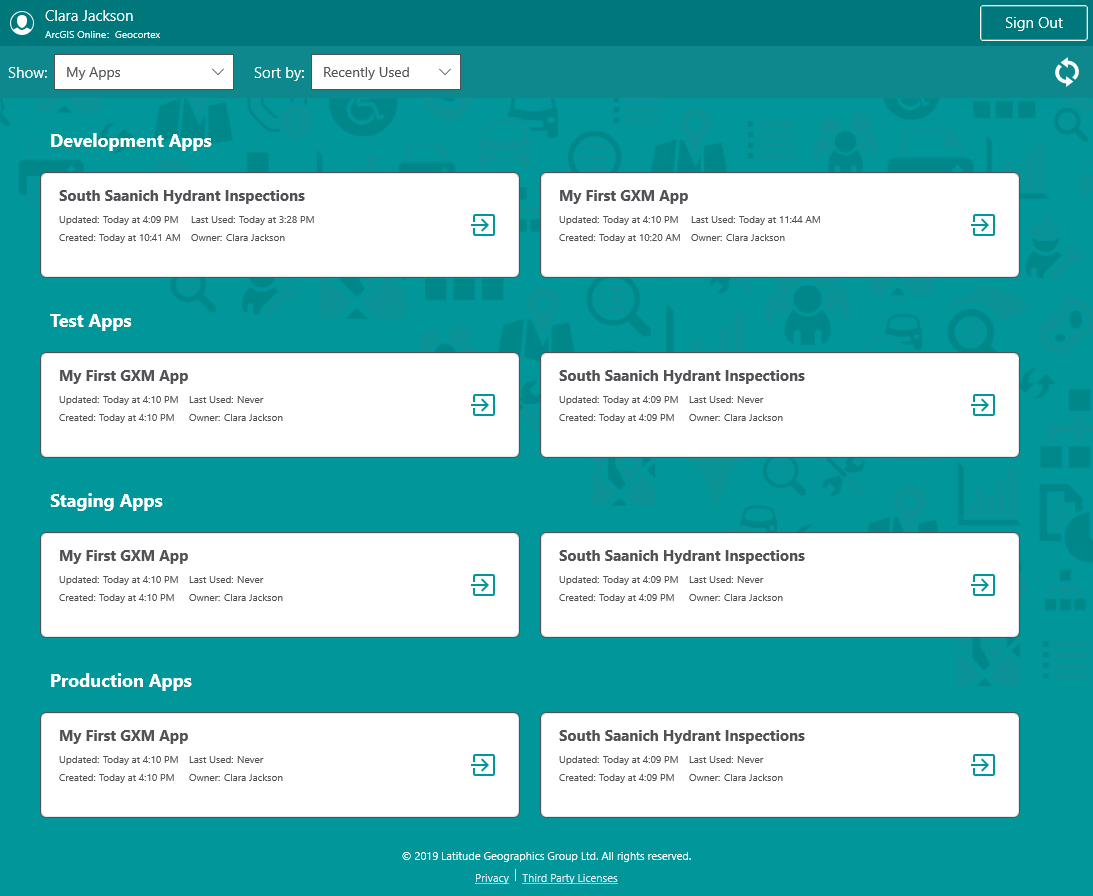 When an app is deployed to a deployment stage, the name of that stage is added to the app name in brackets, for example, 1-Salish Sea Orca Mapping (staging).
 -
ArcGIS Online/Portal for ArcGIS:
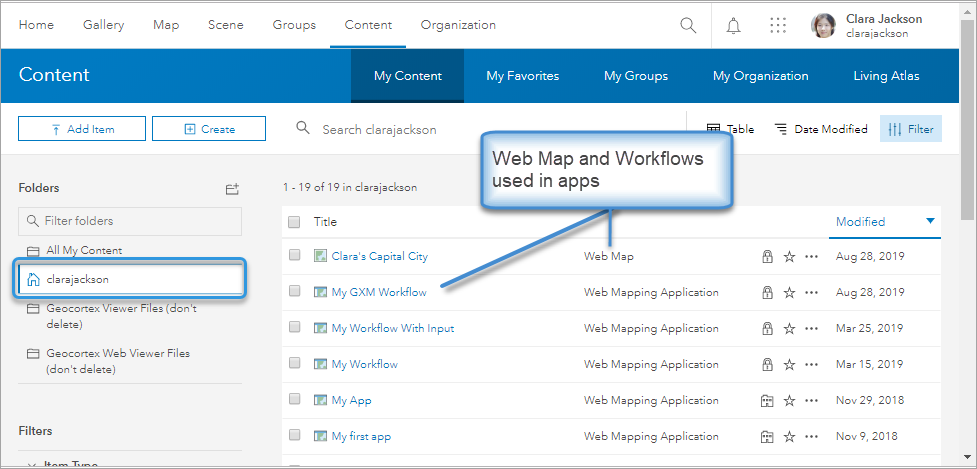
Your original web map and workflows that are used in the apps you create in Mobile Designer are saved in the root of your ArcGIS Online or Portal for ArcGIS account.
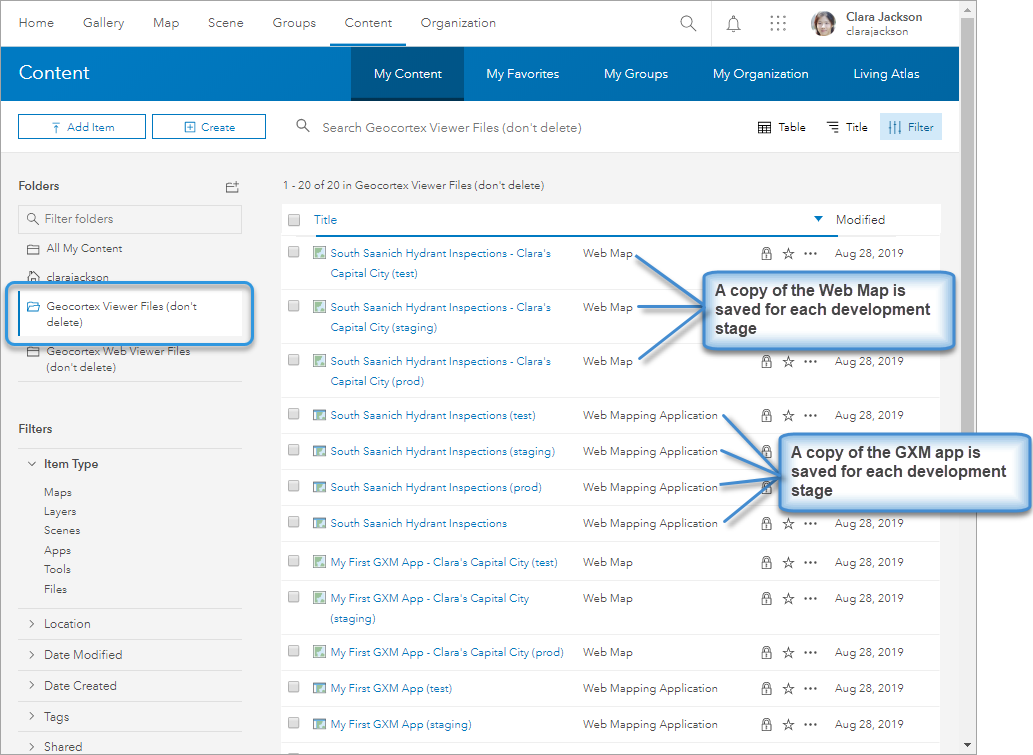
All the subsequent stages of your app after the development stage, are saved in the Web Viewer Files folder.
The table below shows you where to find each version of an app in a Portal or in the VertiGIS Studio Go app.
|
File Name |
Is saved here in Portals: |
Is listed here on the selection screen of |
|
Name of Mobile app |
Root folder |
In the Development Apps section No (dev) label is added to the name |
|
Name of Mobile app (test) |
VertiGIS Studio Web Viewer Files folder |
In the Test Apps section |
|
Name of Mobile app (staging) |
VertiGIS Studio Web Viewer Files folder label: Web Mapping Application |
In the Staging Apps section |
|
Name of Mobile app (prod) |
VertiGIS Studio Web Viewer Files - label: Web Mapping Application |
In the Production Apps section |
Environment Values
Environment Values allow you to substitute text for each deployment stage. This feature is most useful to allow the various deployment stages of the app to use different service URLs.

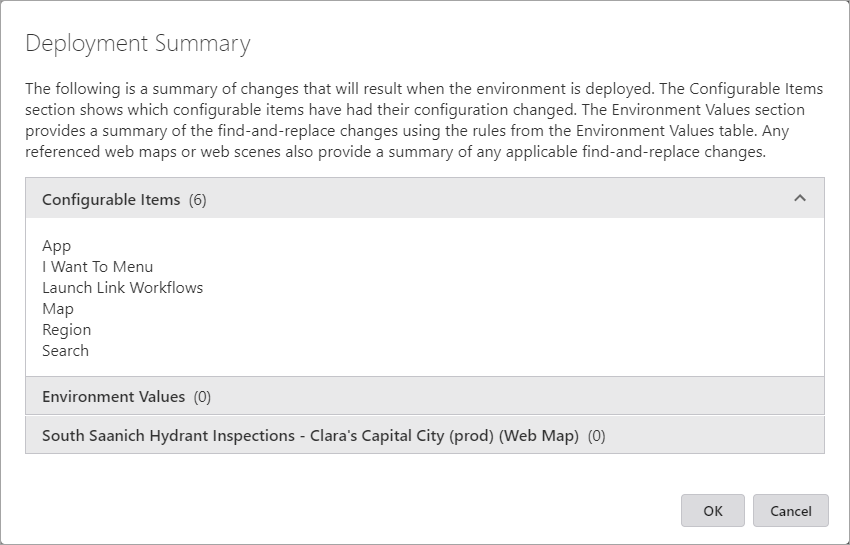
Any parts of your app that are affected by these text changes are listed in the Deployment Summary window that appears when you deploy your app from one stage to another.
Deploy the App
Once you have configured the app to have the settings you want and saved it, you can push it through the deployment stages.
To select the deployment stages for your app:
If you reduce the number of deployment stages for your app, the excluded stages are permanently discarded.
-
Once you have saved your app in Web Designer, click Deploy.
-
In the Deploy panel, click Change Deployment Strategy, and then choose one of the following:
-
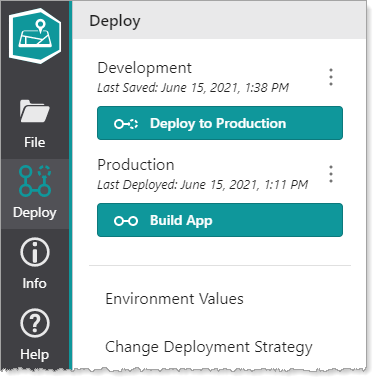
Dev - Prod: Sets the strategy to two stages only -> Development and Production.
-
Dev - Test - Prod: Sets the strategy to three stages -> Development, Testing and Production.
-
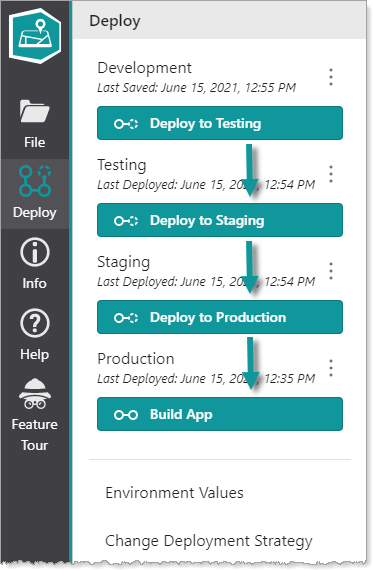
Dev - Test - Staging - Prod: Sets the strategy to four stages -> Development, Testing, Staging and Production.
-
-
Click File | Save.
To deploy the app:
-
Once you have saved your app in Mobile Designer and selected the deployment stages, if you are not in the Deploy panel, click Deploy.
-
When your app is ready for testing, click Deploy to Testing if applicable.
If applicable, in the Deployment Summary window that appears, review the changes that have occurred since the last time you deployed to the Testing stage, and click OK.
-
When your app is ready for staging, click Deploy to Staging if applicable.
If applicable, in the Deployment Summary window that appears, review the changes that have occurred since the last time you deployed to the Staging stage, and click OK.
-
When your app is ready for production, click Deploy to Production.
In the Deployment Summary window that appears, review the changes that have occurred since the last time you deployed to the Production stage, and click OK.
Once your app has gone to Production, it is ready to be built into a file that can be distributed to users.
Replace the Development App with a Different Stage
You can replace the app that is in the Development stage and overwrite it with the one that is currently in either Testing, Staging or Production stage.
To replace the Development stage app with one from another stage:
-
Click Deploy in the taskbar and then click the menu icon
 beside Development.
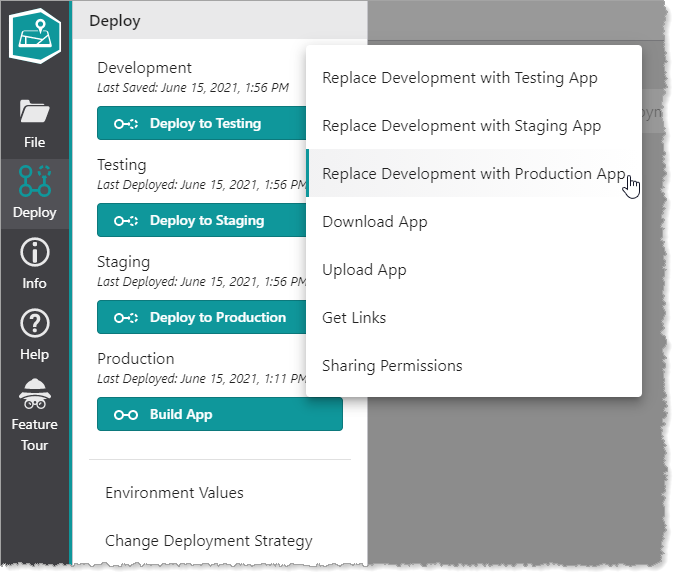
-
In the menu, select to replace the Development app with either the Testing, Staging or Production version.
The Deployment Summary window opens with a list of the changes that will be made to the Development app for Configurable Items, Environment Values and referenced web maps.
- Click OK to implement the changes.
- Save the new version of the Development app.
- If you want to keep the changes to the development app, click File | Save.