Back Up a Clustered Installation
For information about backing up an unclustered installation, see Back Up an Unclustered Essentials Installation.
The Geocortex Index Backup Utility helps you to create a central repository in which to store backups of all the Geocortex Core, Geocortex Essentials, and Geocortex Analytics indices within a cluster.
The backups are incremental, meaning that, when you back up a new version of a repository, only the changes since the last backup are saved. This makes the process faster and saves space on the machine that the repository is on. You can configure which of the Core, Analytics or Essentials indices you want to include or exclude in any backup. You can also schedule backups to occur at regular intervals and manage them by removing those that are no longer relevant.
The Backup Utility ships with Core and can be found with the other diagnostic utilities that you can use to manage and troubleshoot Core.
The default installed location for the Backup Utility on each node is:
C:\Program Files\Latitude Geographics\Geocortex Core\Diagnostics\BackupUtility
If you plan to use this utility often, you can copy the shortcut to the Index Backup Utility that is in the C:\Program Files\Latitude Geographics\Geocortex Core\Diagnostics folder to your desktop.
Backups need to be run separately on each Node in the cluster, even though they are saved to the same central network location and the same repository.
Before you create a repository, ensure that the folder on the network where you plan to store the backup repositories, is accessible by all the nodes in the cluster.
If you are running Core under the default account, the computer account on each node in the cluster must have read, write, and edit permissions to access the repository folder.
If you are running Core under a non-default account, then that non-default account must be given read, write, and edit permissions to access the repository folder.
If Core is not able to access the repository folder, it may not be able to restart when the Core Service is restarted.
If the permissions on the repository folder change, then Core may not be able to restart.
If you have a virtual machine (VM) as part of your cluster, it often has the option of capturing a snapshot and restoring from the backup. Using a VM to take a snapshot and then rolling it back can cause a cluster to lose data.
Create a Repository
The first time you open the Backup Utility, you need to create a repository for the backups you take for this cluster. You need to choose a name and a storage location for the repository. When you run the repository from other Nodes, use the same repository name and location (URL). We recommend that you select a location that is outside of the cluster environment.
When you create a repository, it is necessary to shut down and restart the Core Service on each node in the cluster. We recommend that you only create a repository and run backups during low-use periods.
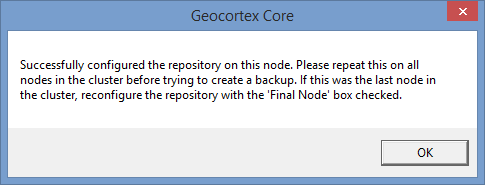
When you get to the last node in the Cluster, it is important to select the Final Node checkbox on the Create a Repository page. If you forget to select the Final Node checkbox, reconfigure the repository with the checkbox selected.
To create a backup repository:
-
In Windows Explorer, navigate to the Diagnostics folder, and in the
BackupUtilityfolder, double-click theGeocortex.Platform.IndexBackupUtility.exefile to open the application. -
In the Repository Name box, type in the name for this repository.
Ensure that the name identifies the cluster and content of the repository so that it is easy for others to identify the purpose of the repository.
-
In the Repository Location box, paste in the path or browse to the central location on the network where you want the repository to be located.
-
If you only have a single node in the cluster, or you are linking to the repository from the last node in your cluster, select the Final Node checkbox.
-
Click Configure.
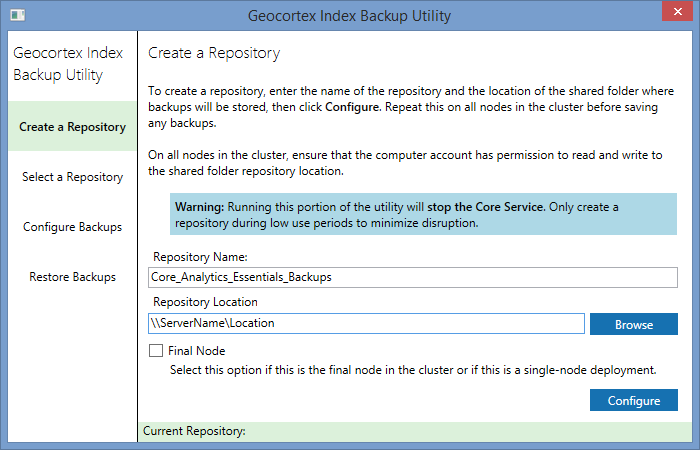
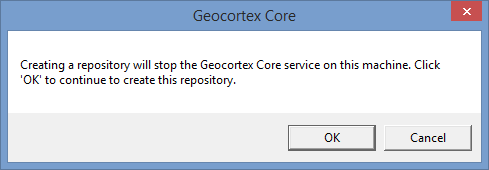
A warning displays to be sure that you are aware that the Core Service will be shut down on this computer while the repository is created.
-
Click OK.
The spinner displays while the application creates the repository.
A confirmation of the creation of the repository displays with a reminder to run the utility on all the other nodes in the cluster.
-
Click OK.
The utility switches to the Select a Repository window, so that you can select a repository for a backup.
Select a Repository
The very first time you open the application, it opens at the Create a Repository page, but once you have created a repository, the application opens to the Select a Repository page so that you can select an existing repository in order to do a backup.
To select a repository to store your backup:
-
In the Available Repositories box, click the repository that you want to use for this backup, and then click Select.
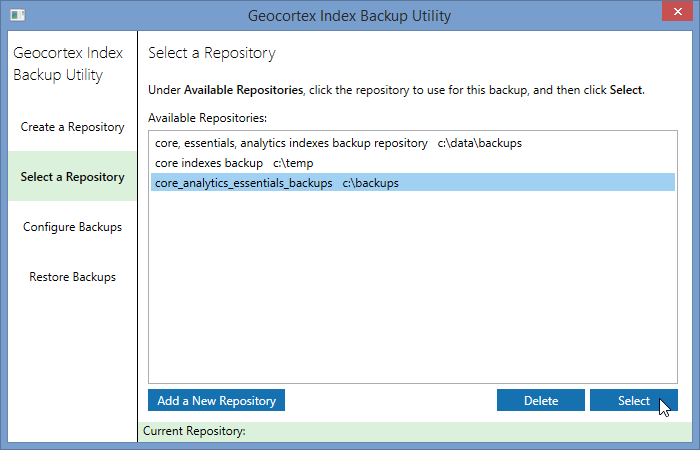
Once you have selected a repository, its name appears in the green bar at the bottom of the window, so that you can see where this backup will go in all the subsequent windows.

-
If you want to add a new repository click the Add Repository button or Create a Repository on the sidebar.
-
To select specific indices to back up, or to select the indices for Core, Analytics, or Essentials specifically, click Configure Backups.
Configure Backups
If you do not select specific indices to include in a backup, by default, all the indices from Core, Analytics, and Essentials are included in the backup. You can create a maximum of 90 backups within a single repository. If you continue past 90, when you create the next backup, the oldest backup is deleted and replaced with the newest one.
Take a Backup Immediately
To take a backup immediately:
-
In the sidebar, select Configure Backups.
-
In the Enter a name for the new backup box, type in the name for this backup.
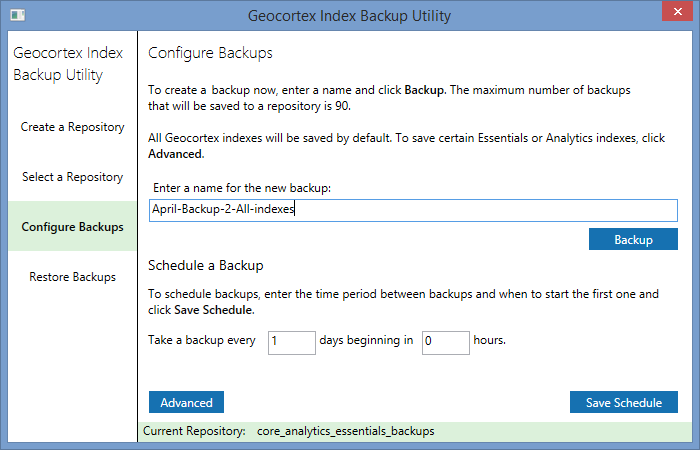
The name of each backup must be unique and cannot contain spaces, forward or back slashes, underscores, or some other characters. If you try to use those characters, the utility warns you to type a name that does not contain those characters.
-
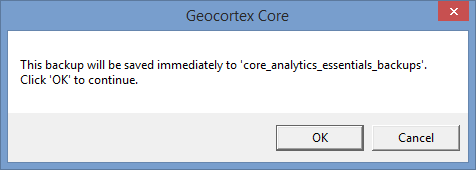
Click Backup.
A confirmation message displays to indicate which repository this backup will be saved to.
-
Click OK.
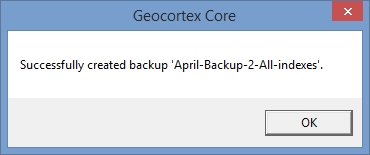
The backup is created and saved to the repository.
-
When the Successfully created backup message displays, click OK.
Schedule Regular Backups
To schedule regular backups:
-
In the sidebar, select Configure Backups.
-
In Schedule a Backup section of the window, do the following:
-
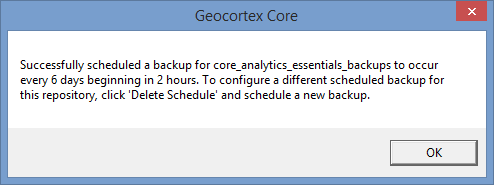
In the Take a backup every box, type in the number of days you want between backups.
Backups will then occur every so-many days.
-
In the beginning in box, type the number of hours from now that you want the backup to begin.
If you leave the zero in this box, a backup will start immediately. Otherwise the utility starts a backup after the number of hours you enter.
-
-
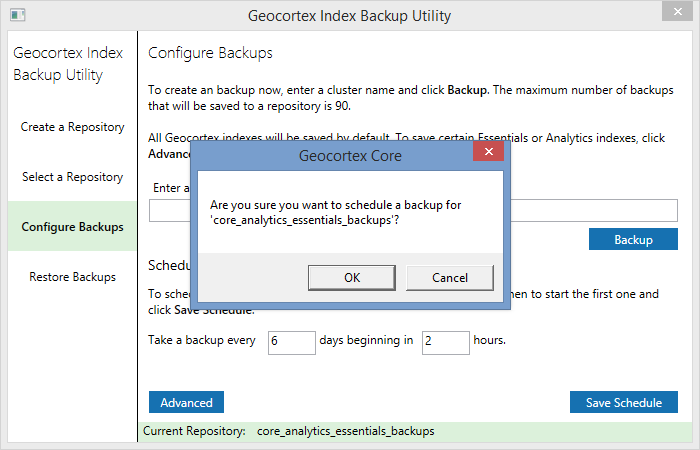
Click Save Schedule.
A message displays so that you can confirm that you want to schedule a backup.
-
Click OK.
A success message displays to inform you about the times for this scheduled backup.
-
Click OK.
To verify that your scheduled backups are running as expected, you may want to run the backup utility intermittently to check that the backups you expect are present. System changes can affect scheduled backups in unexpected ways.
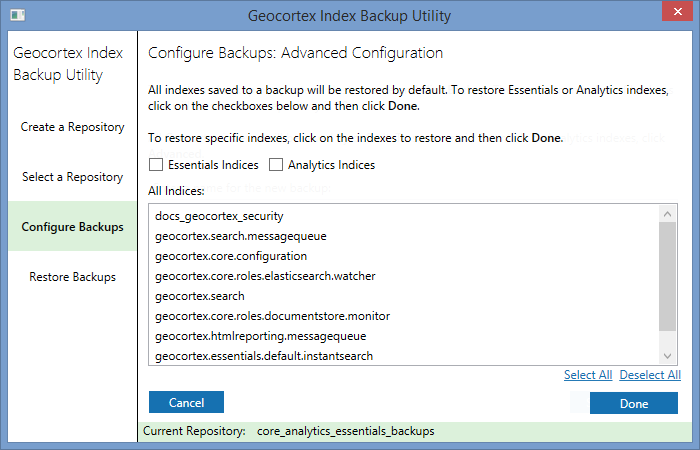
Specify Which Indices to Back Up
To specify which indices to back up:
We recommend that you back up all your indices, or that you back up Analytics and Essentials indices, depending on what you have in your cluster. In most cases, selecting specific indices is not likely to be needed.
-
In the Configure Backups window, click Advanced.
The Configure Backups: Advanced Configuration page opens. The Geocortex Core indices are listed in the All Indices box.
-
To select specific indices to back up, do any of the following:
-
To back up all the indices on this node, click Select All below the All Indices box.
-
To back up only Essentials indices, click Deselect All below the All Indices box and then click the Essentials Indices checkbox.
-
To back up only Analytics indices, click Deselect All below the All Indices box and then click the Analytics Indices checkbox.
-
To back up specific indices, click on the indices in the list you want to back up.
-
-
When you have selected the indices you want to back up, click Done.
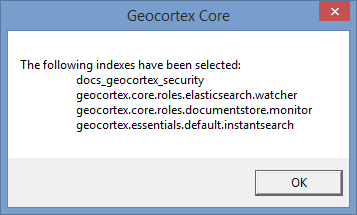
A message displays listed the indices you selected.
-
If you are happy with the selection, click OK.
If you have scheduled a backup, those indices will be backed up at the scheduled time.
-
If you set up the backup to be done immediately, you return to the Configure Backups window where you click Backup.
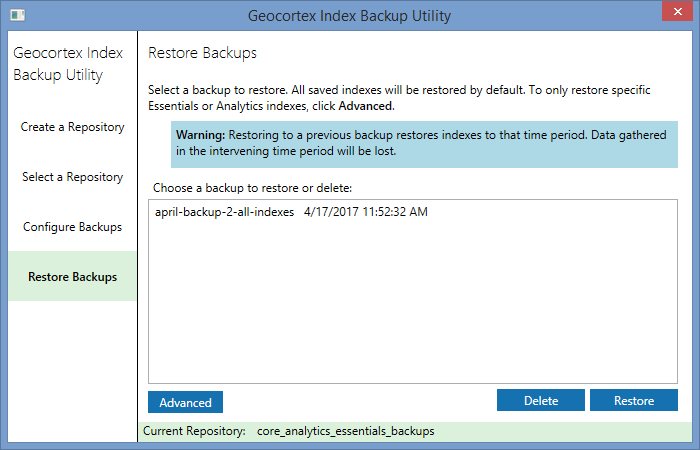
Restore a Backup
Once you have created backups, you can restore them from the Restore Backups page.
When you restore from a backup, any data that has accumulated in the indices since you made that backup, will be lost.
We strongly recommend that before you restore a previous backup, you first create a backup of the whole cluster and all the indices in their current state. That way you can return to the current state if you need to.
You do not have to restore an entire backup. You can select one specific index to restore, or restore the indices from one specific application. You can also cherry-pick specific indices from a list.
Restore a Whole Backup
To restore a whole backup:
-
On the sidebar, select Restore Backups.
The Restore Backups window displays with a list of backups for you to select.
-
In the Available Backups box, select the backup you want to restore.
-
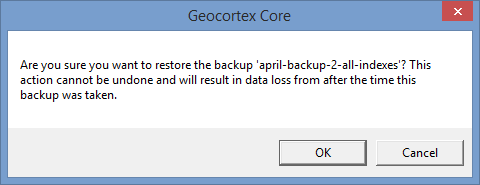
Click Restore.
A warning message explains that this action cannot be undone and that you may lose the data collected in the time since the back up was taken.
-
Click OK.
A success message displays.

-
Click OK.
Restore Specific Indices from a Backup
To restore specific indices from a backup:
-
On the sidebar, select Restore Backups.
-
On the Restore Backups page, click the backup that you want to use to restore indices.
-
Click Advanced.
-
In the Manage Backups: Advanced Configuration window, do any of the following:
-
To restore all the indices in the backup, click Select All, and then click Restore.
-
To restore only the Essentials indices in this backup, click the Essentials Indices checkbox.
-
To restore only the Analytics indices, click the Analytics Indices checkbox.
-
To restore specific indices, click on the indices in the list that you want to restore.
To be sure that you do not lose data, you may wish to make this selection with the help of Latitude Support.
-
-
Click Done.
A message displays listing the indices you selected to restore.
-
Click OK.
-
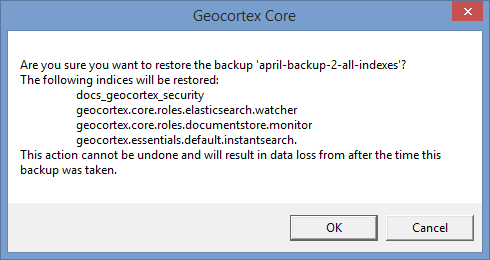
When you return to the Restore Backups window, click Restore.
A confirmation message shows you the list of indices you selected to restore.
-
Click OK.
When the success message displays, click OK.
-
To verify that the backup saved the indices you selected, click Restore Backups and then click Advanced.
-
In the Manage Backups: Advanced Configuration window, click the repository and check that the indices you selected are there.