Configure a Viewer in Manager
Main Steps to Configure a Viewer
The main steps to configure a viewer in Manager are:
-
You must add the viewer before you can configure it. Adding the viewer opens it for editing. To configure an existing viewer, edit the viewer.
When a viewer is open for editing, Manager's side panel has a Viewer section with links to the viewer's Management Pack pages, provided the HTML5 Viewer's Management Pack is installed.
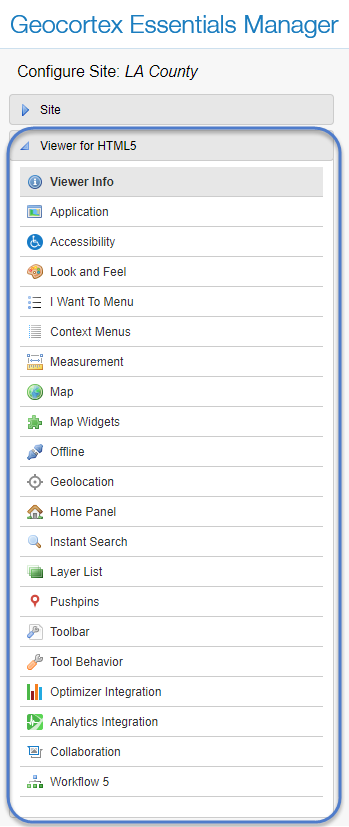
Viewer section of Manager's side panel
-
In the Viewer area of Manager's side panel, click the link for the desired page.
-
Before you configure the settings on any HTML5 viewer configuration page in Manager, consider whether the settings will be the same for the Desktop, Tablet, and Handheld interfaces.
-
If you are not sure, keep the settings the same by configuring the interfaces together—you can configure them separately later without losing any changes you have made.
-
If you are sure you want the settings on the Look and Feel page to be different, click the Configure Individually hyperlink. You can switch back to configuring the interfaces together at any time, but you may lose some of the changes you have made.
For more information, see Configure Multiple User Interfaces.
-
-
Modify the settings as desired.
For information about the settings on a particular page, refer to the documentation for that page.
-
Apply your changes.
-
Preview your changes.
For more information, see Use the Live Preview.
-
When you are satisfied with your changes, click Save Site.
Add a Viewer
You must add a viewer to the site before you can modify its settings.
To add a viewer to a site:
-
In
-
Click Add Viewer.
If the Add Viewer icon is not available, click Save Site.
-
In the Display Name text box, type a display name for the viewer.
Avoid long viewer display names. Display names affect Windows file paths, which must be less than 260 characters.
-
In the Template drop-down list, select the template to base the viewer on.
If there are no templates listed in the Template drop-down list, there are no templates installed. See Install the Viewer Framework Using a Viewer Template for instructions on installing the HTML5 Viewer template.
-
Click OK.
The viewer is added to your site and the viewer opens for editing.
-
To open the viewer, click the Launch in Browser hyperlink.
Edit a Viewer
To edit a viewer:
-
Launch Geocortex Essentials Manager.
-
Windows Server 2012 or Windows 8, and Newer Versions:
On the Start screen, type Geocortex, and then click Geocortex Essentials Manager.
-
Windows Server 2008 or Windows 7:
In the Start menu, select All Programs | Latitude Geographics | Geocortex Essentials [Version] [Instance] | Geocortex Essentials Manager.
[Version] is the Essentials version number. [Instance] is the instance name, if Essentials is installed as a named instance. The default installation does not have an instance name.
-
-
Edit the site whose viewer you want to configure:
-
Click the Sites tab.
-
If a different site is open for editing, click Save Site, and then click Close Site.
-
Follow the instructions for the view of the Site List that you are using:
-
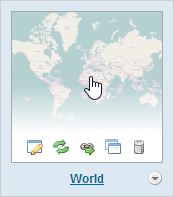
Tiled View:
-
Click the thumbnail image of the site that you want to edit, or
-
Click the site's name, or
-
Position the pointer over the thumbnail image of the site that you want to edit, and then click the Edit icon
 .
.
-
-
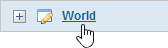
List View:
-
Click the site's name, or
-
Click the Edit icon
.
If there is a problem with a map service in the site, you are asked whether you want to remove the service from the site. To proceed with editing the site, you must remove the map service. If you do not agree to remove the map service, the site closes. Note that removing the service can leave empty folders in the Layer List.
-
-
-
-
Click Viewers in the side panel.
-
Click the Edit icon
beside the viewer that you want to configure.The viewer opens for editing.
Customize the Splash Screen Image
When a user launches an HTML5 viewer, the viewer displays a splash screen while the viewer loads. The splash screen contains an image and some licensing text. The default image contains a small graphic of a city and the words Your Organization.
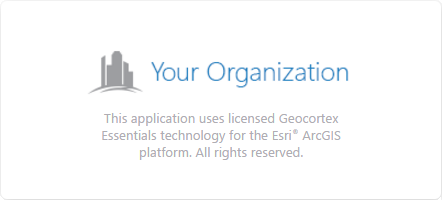
Default splash screen
The default splash screen image is a placeholder that you can replace with a custom image. Geocortex Essentials Manager's Site Info page has a Splash Screen Image URL setting where you configure the location of the image that you want to use. The custom image that you configure applies to all the HTML5 viewers in the site.
The splash screen has a built-in margin around the image, so the image does not touch the border or the licensing text. You cannot change the licensing text. The default image is a 260 x 60 pixel PNG image of about 1.3 KB. To ensure reasonable performance, we recommend that you limit your image to about 4 KB, with dimensions no larger than 300 x 300 pixels. In the Handheld shell, if the image is larger than 260 x 260 pixels, the viewer resizes the image at run time so its dimensions are at most 260 x 260 pixels. This ensures that the image fits the smaller display area that handheld devices offer.
Animated images do not perform well in the splash screen, because the splash screen displays while the viewer is busy loading.

Splash screen with a custom image
Before HTML5 Viewer 2.6, the splash screen image was configured by editing the Index.html file. We do not recommend this method, because changes to the Index.html file can be lost when you upgrade the Viewer.
The splash screen image can be stored anywhere, as long as the viewer can access the location. If you own the image, you can store it in a virtual directory with your other static content. In this case, you can use a relative URL when you configure the image's location. Alternatively, you can specify an absolute location, for example, a fully qualified URL to an image on the web.
Configure the Splash Screen Image
To configure a custom splash screen image for a site's HTML5 viewers:
If you configure a short URL in the viewer's ViewerSettings.json.js file, then you must configure the splash screen image in the ViewerSettings.json.js file with the short URL, instead of doing the configuration in Manager. For instructions, see Short Viewer URLs.
-
If you want to create your own image to use in the splash screen, create it now.
We recommend that you limit the image to about 4 KB in size, with dimensions no larger than 300 x 300 pixels. Using a transparent background usually gives the best results. The HTML5 Viewer supports any image file format that web browsers support. We recommend PNG or JPG.
-
If you want to store the image locally, save the image to a virtual directory.
If you are going to use the same splash screen image for more than one site, put the image in the Global virtual directory. Otherwise put the image in the site's virtual directory.
-
In
-
Enter the image's URL in the Splash Screen Image URL box using one of the following methods:
-
Browse a Virtual Directory: If the image is in a virtual directory, click Browse and select the image file.
-
Enter the Fully Qualified URL: If the image is not located in a virtual directory, type or paste the image's full URL, for example:
http://host.domain.com/resources/images/myimage.png
-
-
Click Apply Details.