Printing Module
The Printing Module implements the ability to print the map image. To configure printing, you must create a print template in Geocortex Essentials Report Designer and then use Geocortex Essentials Manager to add the print template to the site. In Manager, you can configure options that allow the user to select the map scale and resolution, as well as textual content such as the title or notes to add to the printout. For information, refer to the Essentials Reporting help.
By default, HTML5 viewers have a Print tool in the toolbar. If the site does not have any print templates, the Print tool is grayed out in the toolbar.

Print tool
Printing in the Desktop and Tablet Interfaces
In the Desktop and Tablet interfaces, the map previews the extent to be printed using an overlay. The user can adjust the print preview overlay to match their printout exactly. The procedure to adjust the extent is as follows:
-
Pan and zoom the map to center the area of interest in the map viewport.
Zooming the map does not change the scale at which the map prints.
-
Select the Lock print preview with map checkbox to lock the print preview overlay to a position on the map.
Deselect the checkbox to move the print preview extent around the map.
-
Change the Map Scale setting as needed to ensure the overlay covers the desired area.
The Map Scale setting's Current Extent option guarantees that everything in the viewport will be printed.
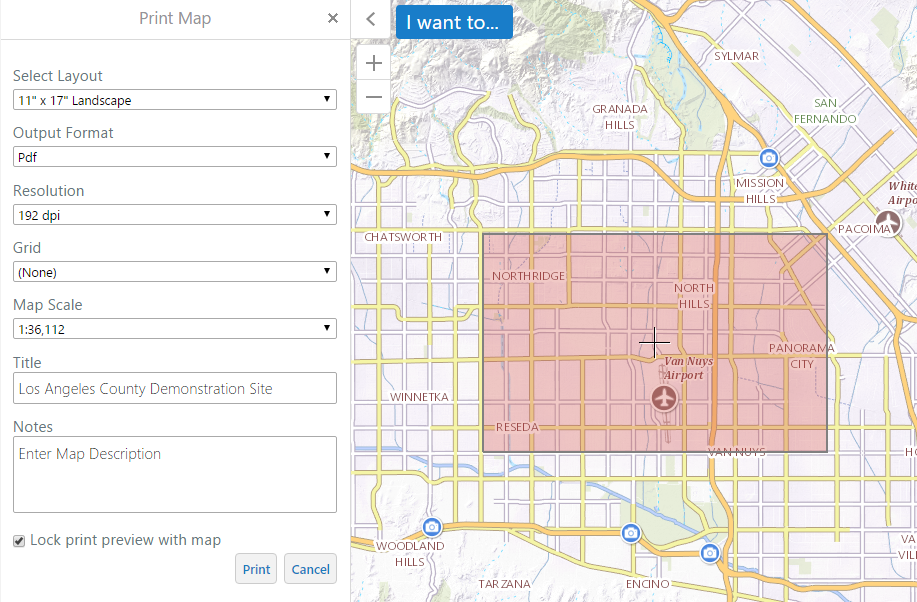
Extent preview shown in the Desktop interface
To print the map, the user clicks Print and waits to be prompted to download the printout.
Printing in the Handheld Interface
In the Handheld interface, clicking the Print tool opens the Print Map panel in the Bottom Panel. The print preview overlay is not shown initially.
The Handheld interface does not use UnlockedPrintPreviewView. Instead, users can look at the print preview extent with the "Center print here" and "Hide print preview" buttons in the Print Map panel.
To adjust the print preview extent, the user follows this procedure:
-
Pan and zoom the map to center the area of interest in the map viewport.
Zooming the map does not change the scale at which the map prints. The user may need to zoom out to see the extent of the overlay.
-
Change the Map Scale setting as needed to ensure the print preview overlay covers the desired area.
The Map Scale setting's Current Extent option guarantees that everything in the viewport will be printed.
-
Repeat steps 1 and 2 until the map viewport displays the area you want to print at the desired scale.
-
Clicks Center print here.
The print preview overlay displays on the map and the map zooms out so the entire overlay is visible. This does not change the scale used for the printout—the Viewer uses the scale selected when the print was centered.
To print the map, the user clicks Print and waits to be prompted to download the printout.
Print Output Settings
The Print Map panel allows users to configure how their extent will be printed.
-
Select Layout: Lists the site's available print templates.
-
Output Format: Lists the available file formats to send the printout to. (For example, a PDF.)
-
Resolution: Lists the available resolutions for the printout in DPI (dots per inch).
-
Grid: Configures whether a grid overlay measures the map printout in latitude/longitude or map units, or, alternatively, whether the grid overlay is hidden.
The selected print template may add additional fields to the Print Output settings. This depends on whether a print template has other fillable fields configured, such as a title or description.
Configuration Properties
Module
No configuration properties
Views
-
PrintingView: Noconfigurationproperties -
UnlockedPrintPreviewView: NoconfigurationpropertiesThe Handheld interface does not use
UnlockedPrintPreviewView. Instead, users can look at the print preview extent with the "Center print here" and "Hide print preview" buttons in the Print Map panel.
View Models
-
PrintingViewModel:-
previewBackgroundColor: The background color for the print preview extent in an RGBA color format (i.e.[211, 211, 211, 0.6]). -
previewBorderColor: The print preview extent overlay border in an RGB color format (i.e.[0, 0, 255]). -
previewBorderThickness: An integer that sets the print preview extent overlay border thickness in pixels. -
previewCenterImageUrl: A relative URL to the image used to mark the center of the print preview extent overlay.
-